Content
Easy Web3 Security: Testnet Blocking Tutorial
Understanding real-time web3 transaction security has never been easier with CUBE3’s Runtime Application Self-Protection (RASP) Block product, now available on Sepolia testnet. There is no engineering, no coding and everything is visible on-chain.
Our objective is to create transparency and increase awareness of how to defend contracts from malicious transactions with real-time transaction protection. Therefore, we created a simple 4-step tool for anyone to use. In a test environment, you can see how CUBE3 protects contracts by blocking malicious transactions, in real-time.
Let’s get testing!
Before you begin, be sure your MetaMask account has Sepolia network tokens. Need some? Use the (free) Quicknode faucet here.
Introduction
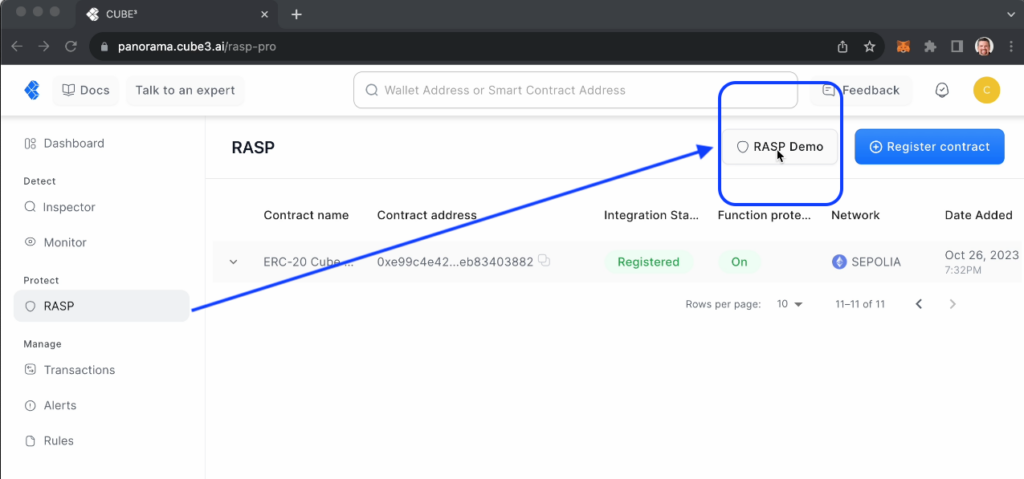
Sign in or up at Panorama.cube3.ai, navigate to our RASP Blocking product, and launch “RASP Demo.”
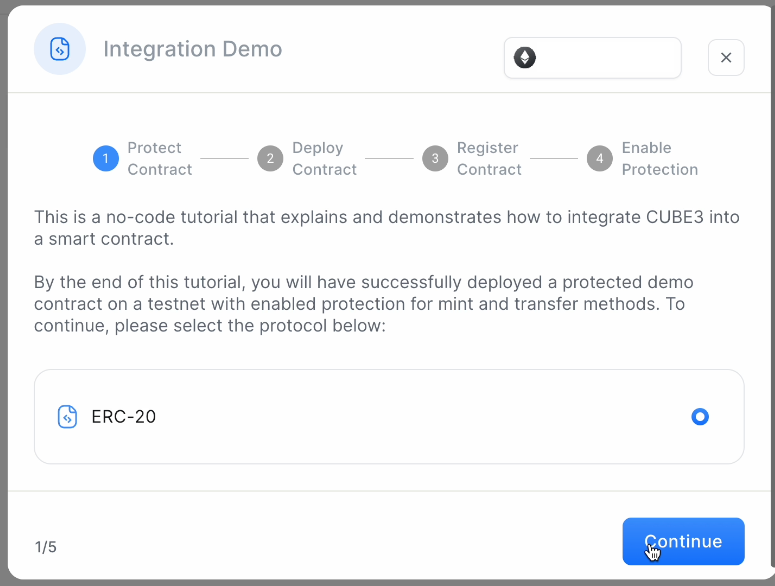
This no-code tutorial modal demonstrates how to integrate CUBE3 into a smart contract.
By the conclusion of these 4 steps, you will have successfully deployed a protected demo contract on a testnet, enabling protection for mint and transfer methods.
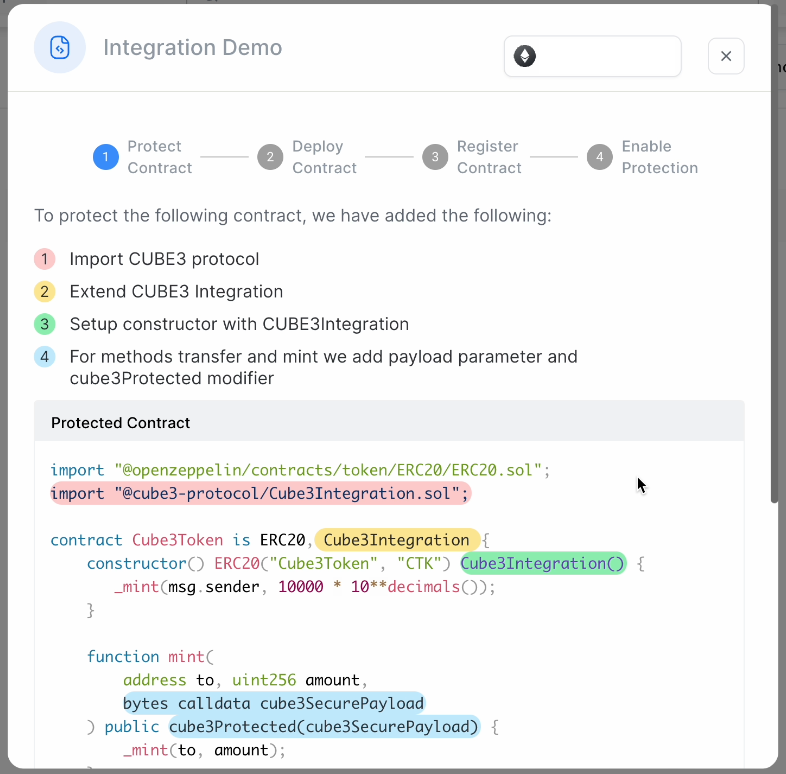
STEP1
The ERC – 20 contract you see is an example of the CUBE3 Protect code. The highlighted portions are what you would add to your own contract. We have color coded the code snippets for clarity.
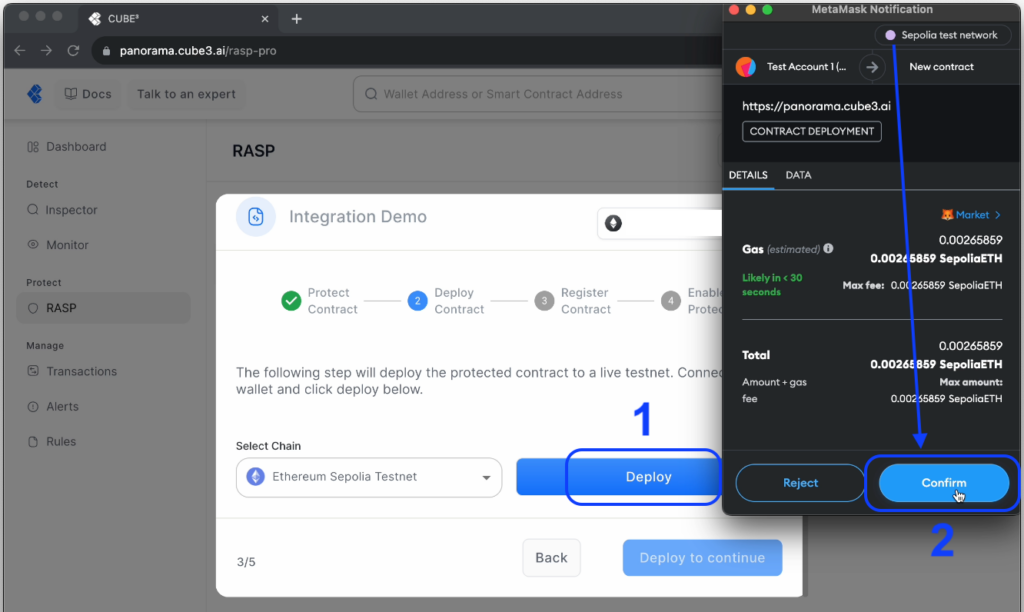
STEP 2
Secondly, deploy the demo contract to the Sepolia network. In order to do so, you will need to sign the transaction via MetaMask. Be sure you are connected to the Sepolia test network and have tokens for minor gas “fees.”
Once your demo contract is deployed…
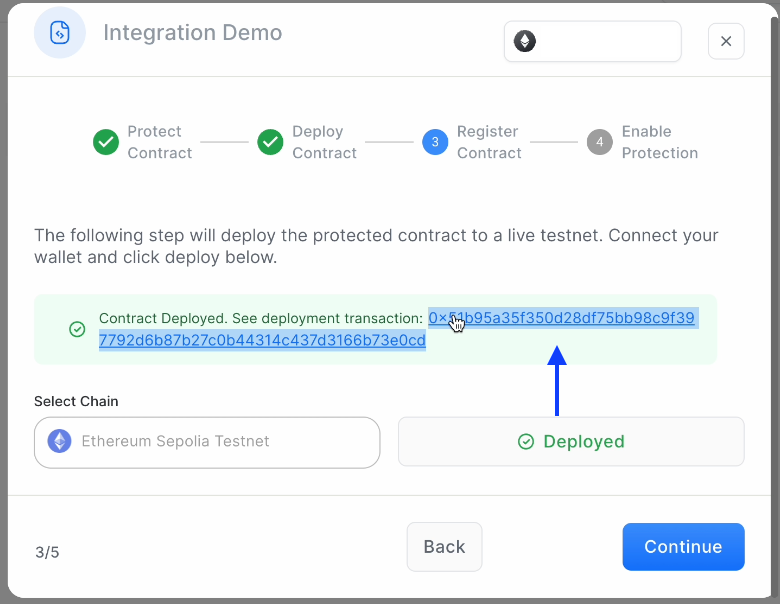
You can click through to view the confirmation/hash, visible on-chain at sepolia.etherscan.
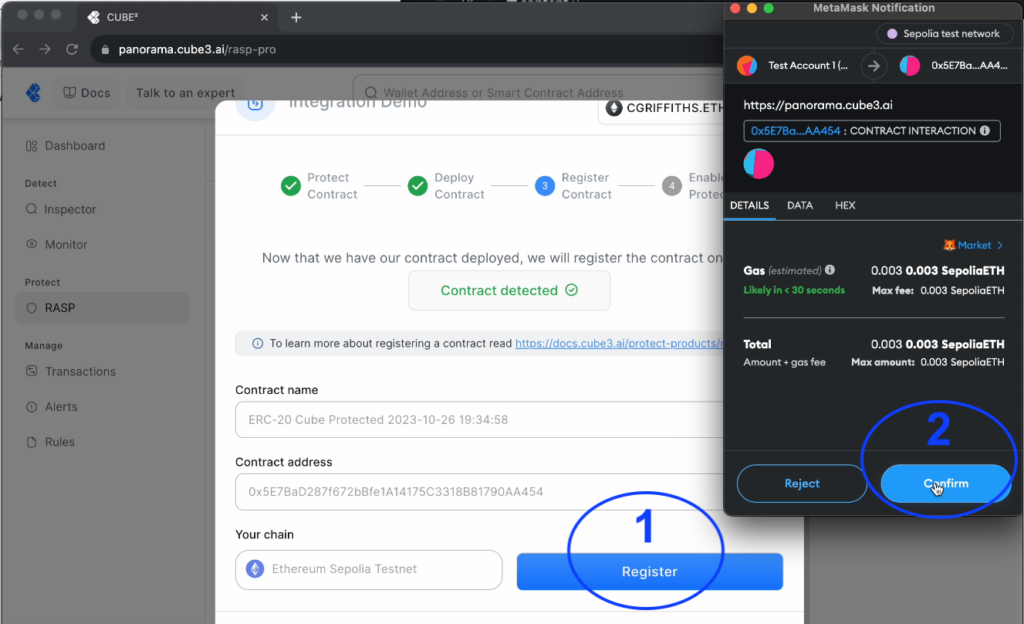
STEP 3
After the contract has been deployed, we will need to register it with CUBE3 protocol in order to enable protection of its functions. We will automatically generate a token in this test flow. If you were registering your own contract in a production environment, you would need to save your token securely. Learn more about standard contract registration here.
STEP 4
Guess what? Step 4 is automatically enabled for you in this test environment!
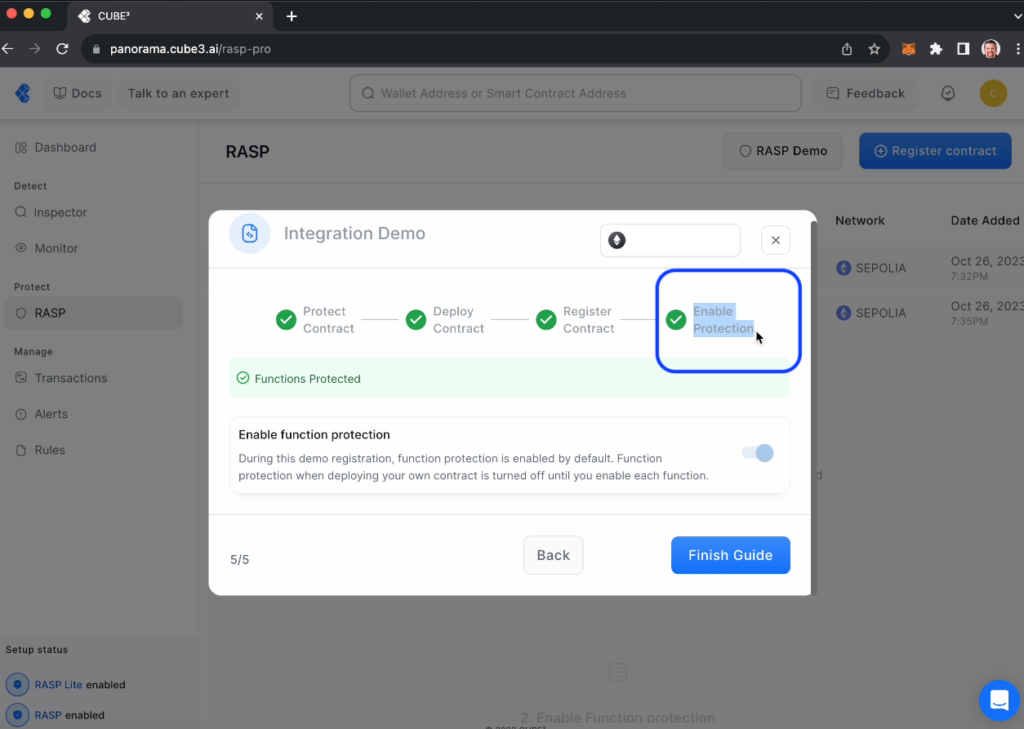
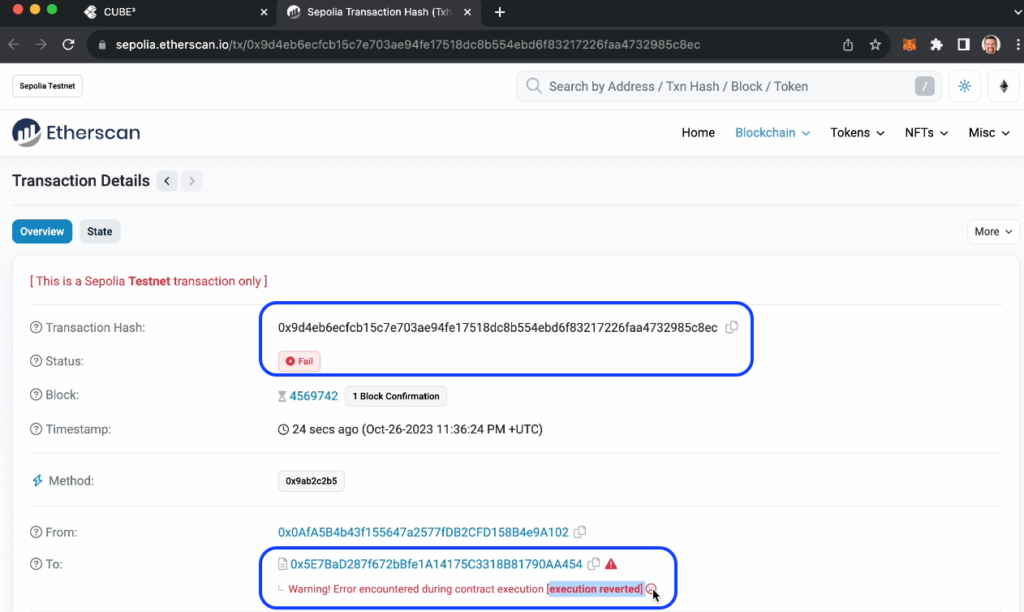
Generally, if this was a contract deployed to Ethereum Mainnet, you would choose to enable protection after you had thoroughly tested (and audited) your contract, and were ready to enable CUBE3 protection. In this test case, you will have simulated transactions appear in your transactions section that show you how transactions statuses labeled “Safe,” “Warning” and “Unsafe” are enforced. Accordingly, “Unsafe” transactions are “Blocked.”
Concurrently, you can see the blocked (”failed”) transaction on-chain by clicking the “On-Chain Transaction ID” and verifying on sepolia.etherscan:

Obviously, the frown face will be how malicious actors feel when they can’t exploit your contract!
CONCLUSION
In conclusion, we hope this simple 4-step guide helps you understand the CUBE3.AI’s Runtime Application Self-Protection (RASP) Block product. For the sake of transparency, education and utility, our team worked to create a simple no-code way to deploy, register and simulate malicious transactions. Consequently, we hope you and your community use this self-service RASP tool, so you don’t have to experiment in the wild.
Explore further by reviewing our documentation. If you have any other questions, reach out directly at [email protected] and join our Telegram group https://t.me/CUBE3aiCommunity.
CUBE3.AI is committed to making web3 the safest place to transfer value and your participation, your feedback and effort is appreciated. 🙏
 CUBE3.AI
 Tamás Kelemen
 Sarunas Matulevicius
 Attila Marosi-Bauer
 Einaras Gravrock